In the world of confectionery, there is a different and interesting category of cakes, which are called upside-down cakes. To bake this cake, a layer of caramel is poured on the bottom of the mold and covered with sliced fruits. These fruits can be pineapple, apple, banana and strawberry, pear, or any other fruit. Pineapple upside down cake is one of the most popular of these cakes. What are the ingredients and how to prepare this cake?
About This Recipe
There are a bunch of different kinds of cakes that we call upside-down cakes. Arrange sliced any kind of fresh fruits in the bottom of a cake pan, pour quick caramel on fruits and then top with a buttery batter. Today I will make pineapple upside-down cake, an incredible cake that will wow anyone who tries it. This cake has a pretty simple recipe to follow.
What Do You Need to Make Upside Down Pineapple Cake?
- Sliced pineapple
- Butter
- Brown sugar
- Canned sliced pineapple
- Cherry
- Flour
- Baking powder
- Salt
- Sugar
How to Make Upside Down Pineapple Cake Like a Pro?
- Before starting, gather the ingredients and place them on the countertop.
- Measure the required ingredients accurately.
- Make sure that all your ingredients are at room temperature and fresh.
- It is better to use light brown sugar to cook caramel.
- You can also use fresh pineapple instead of canned pineapple. Just note that fresh pineapple is less sweet than canned pineapple.
- A round mold with a size between 20 and 23 cm for this cake.
Did you like the upside down pineapple cake recipe? Try my cinnamon apple sheet cake recipe as well! Leave your comment below and If you make this recipe, be sure to tag your photos #yummynotes 

Ingredients
- 50 grams of butter for caramel
- 1/2 cup brown sugar
- Canned sliced pineapple
- Cherry
- 1½ cup flour
- 1 teaspoon baking powder
- 1/4 teaspoon salt
- 3/4 cup sugar
- 120 grams of butter
- 2 whole eggs
- 1/2 cup pineapple juice
Instructions
Step 1
Turn on the oven and set it to a temperature of 180 ° C. grease my baking pan with spray oil. A round mold with a size between 20 and 23 cm for this cake.
Step 2
Place butter and brown sugar into a pan on a medium heat. Whisk them until smooth and sugar is completely dissolved and you can see bubbles on the surface.
Step 3
Pour the sugar and butter mixture into the cake pan. Swirl the pan to form a thin, smooth layer of caramel sauce.
Step 4
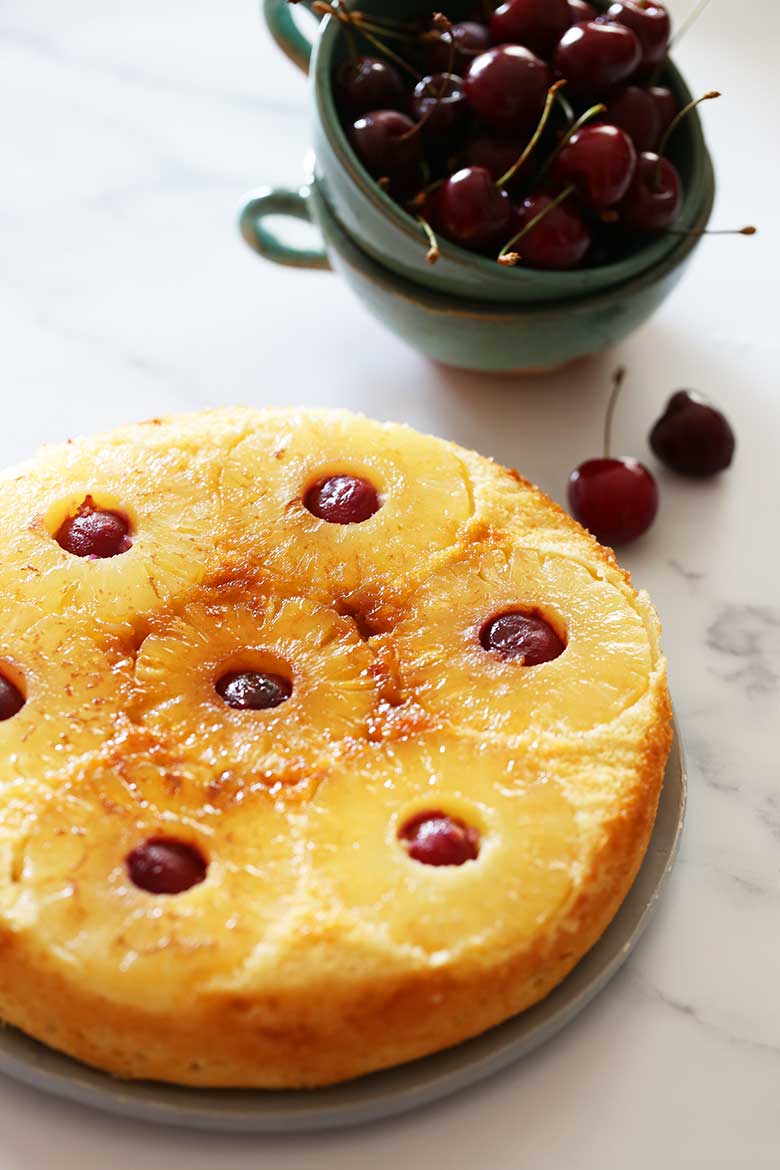
After Caramel sauce is cooled, place pineapple rings on caramel sauce. Put pitted cherries or sour cherries, in the middle of the pineapple rings.
Step 5
Bring the butter out of the refrigerator to the room temperature. Put sugar and butter in a bowl and mix for 5 minutes to make a smooth cream. Add the eggs and stir for about 1 minute to mix well.
Step 6
Now, at this step you should mix flour and pineapple juice. Divide the flour into three parts and pineapple juice into two halves. First, put one third of the flour and add half of a pine apple juice, stir, then add one third of the flour, stir, then add rest of the pineapple juice, stir and finally mix the remaining flour and stir. All this should take a minute, so do not overdo it.
Step 7
The batter of this cake is thick, so be careful not to put it in one place, because when you spread it, you will mess up the fruits and caramel sauce. Put the cake batter carefully on the pineapples and then trim it with a little spoon.
Step 8
Put the cake in the middle rack of the oven. It takes about 45 minutes to bake. Check with a toothpick or knife to make sure it is baked and then remove it from the oven.
Step 9
After removing the upside down pineapple cake from the oven, place it on a metal net to cool slightly enough. Then, with the help of a knife, remove the edges of the cake from the mold, and then turn it into the plate.